Android 系统支持三种不同来源的音频播放:
1)本地资源
存储在应用程序中的资源,例如存储在 RAW 文件夹下的媒体文件,只能被当前应用程序访问。
2)外部资源
存储在文件系统中的标准媒体文件,例如存储在 SD 卡中的文件,可以被所有应用程序访问。
3)网络资源
通过网络地址取得的数据流(URL),例如“http://www.musiconline.com/classic/007. mp3”,可以被所有应用程序访问。
Android N 支持的音频格式如表 1 所示。

实例 MediaPlayerAudioDemo 演示了分别播放三种类型的资源的方法。
该实例中 MediaPlayerAudioActivity 向 Intent 对象中传入要载入的资源类型,并通过该 Intent 启动用于播放音乐的 Activity:PlayAudio。PlayAudio 根据传入的参数分别获取对应的音乐资源并且播放。
实例 MediaPlayerAudioDemo 的运行效果如图 1 所示。
图 1 MediaPlayerAudioDemo的运行效果
实例 MediaPlayerAudioDemo 中的 main.xml 代码如下:
<?xml version="1.0" encoding="utf-8"?>
<LinearLayout xmlns:android="http://schemas.android.com/apk/res/android"
android:layout_width="fill_parent"
android:layout_height="fill_parent"
android:orientation="vertical">
<Button
android:id="@+id/button01"
android:layout_width="fill_parent"
android:layout_height="wrap_content"
android:text="播放存储在文件系统的音乐" />
<Button
android:id="@+id/button02"
android:layout_width="fill_parent"
android:layout_height="wrap_content"
android:text="播放网络中的音乐" />
<Button
android:id="@+id/button03"
android:layout_width="fill_parent"
android:layout_height="wrap_content"
android:text="播放本地资源的音乐" />
</LinearLayout>
实例 MediaPlayerAudioDemo 中MainActivity.java 文件的代码如下:
package introduction.android.batterydemo;
import android.content.BroadcastReceiver;
import android.content.Context;
import android.content.Intent;
import android.content.IntentFilter;
import android.support.v7.app.AppCompatActivity;
import android.os.Bundle;
import android.view.View;
import android.widget.Button;
import android.widget.CompoundButton;
import android.widget.TextView;
import android.widget.ToggleButton;
import org.w3c.dom.Text;
public class MainActivity extends AppCompatActivity implements View.OnClickListener {
private Button button01, button02, button03;
private String PLAY = "play";
private int Local = 1;
private int Stream = 2;
private int Resources = 3;
@Override
public void onCreate(Bundle saveInstanceState) {
super.onCreate(saveInstanceState);
setContentView(R.layout.activity_main);
button01 = (Button) findViewById(R.id.button01);
button02 = (Button) findViewById(R.id.button02);
button03 = (Button) findViewById(R.id.button03);
button01.setOnClickListener(this);
button02.setOnClickListener(this);
button03.setOnClickListener(this);
}
@Override
public void onClick(View v) {
Intent intent = new Intent(MainActivity.this, PlayAudio.class);
if (v == button01) {
intent.putExtra(PLAY, Local);
}
if (v == button02) {
intent.putExtra(PLAY, Stream);
}
if (v == button03) {
intent.putExtra(PLAY, Resources);
}
MainActivity.this.startActivity(intent);
}
}
实例 MediaPlayerAudioDemo 中 PlayAudio 类实现播放音频的功能,根据 MediaPlayer-AudioActivity 类通过 Intent 传递过来的不同的值,而实现三种不同的播放音频的方式。
PlayAudio.java 文件的代码如下:
package introduction.android.batterydemo;
import android.app.Activity;
import android.media.MediaPlayer;
import android.os.Bundle;
import android.widget.TextView;
import android.widget.Toast;
public class PlayAudio extends Activity {
private TextView textview;
private String PLAY = "paly";
private MediaPlayer mediaplayer;
private String path;
@Override
public void onCreate(Bundle savedInstanceState) {
super.onCreate(savedInstanceState);
setContentView(R.layout.activity_main);
textview = (TextView) findViewById(R.id.textview);
Bundle extras = getIntent().getExtras();
playAudio(extras.getInt(PLAY));
}
private void playAudio(int play) {
// TODO Auto-generated method stub
try {
switch (play) {
case 1:
path = "sdcard/music/white.mp3";
if (path == "") {
Toast.makeText(PlayAudio.this, "在SD未找到音频文件",
Toast.LENGTH_LONG);
}
mediaplayer = new MediaPlayer();
mediaplayer.setDataSource(path);
mediaplayer.prepare();
mediaplayer.start();
textview.setText("正在播放文件中的音乐");
break;
case 2:
path = "http://www.musiconline.com/classic/007.mp3";
if (path == "") {
Toast.makeText(PlayAudio.this, "未找到您要播放的音乐",
Toast.LENGTH_LONG).show();
}
mediaplayer = new MediaPlayer();
mediaplayer.setDataSource(path);
mediaplayer.prepare();
mediaplayer.start();
textview.setText("正在播放网络中的音乐");
break;
case 3:
mediaplayer = MediaPlayer.create(this, null);
mediaplayer.start();
textview.setText("正在播放本地资源中的音乐");
break;
}
} catch (Exception e) {
System.out.println("出现异常");
}
}
@Override
protected void onDestroy() {
// TODO Auto-generated method stub
super.onDestroy();
if (mediaplayer != null) {
mediaplayer.release();
mediaplayer = null;
}
}
}
其中,path 指向要播放的音频文件的位置。
本实例中,外部文件系统中的资源是放置在 SD 卡中的 music 目录下的 white.mp3;网络资源使用的是 http://www.musiconline.com/classic/007.mp3;本地资源使用的是 raw 目录下的 black.mp3 文件。
实例 MediaPlayerAudioDemo 中 AndroidManifest.xml 文件的代码如下:
<?xml version="1.0" encoding="utf-8"?>
<manifest xmlns:android="http://schemas.android.com/apk/res/android"
package="introduction.android.batterydemo"
android:versionCode="1"
android:versionName="1.0">
<uses-sdk android:minSdkVersion="10" />
<application
android:allowBackup="true"
android:icon="@mipmap/ic_launcher"
android:label="@string/app_name"
android:roundIcon="@mipmap/ic_launcher_round"
android:supportsRtl="true"
android:theme="@style/AppTheme">
<activity android:name=".MainActivity">
<intent-filter>
<action android:name="android.intent.action.MAIN" />
<category android:name="android.intent.category.LAUNCHER" />
</intent-filter>
</activity>
<activity android:name=".PlayAudio" />
</application>
</manifest>
在该实例中,每次播放音频文件时都会从 MediaPlayerAudioActivity 跳转到一个新的 Activity,即 PlayAudio。
当返回 MediaPlayerAudioActivity 时,由于 PlayAudio 对象被释放掉,因此播放的音乐也随之停止,不再播放。若想在返回 MediaPlayerAudioActivity 时音乐不停止,则需要使用 Service 在后台播放音频文件。
实例 AudioServiceDemo 演示了如何在后台播放音频。该实例的运行效果如图 2 所示。当用户单击“启动 Service”按钮时,当前 Activity 结束,应用程序界面消失,返回 Android 应用程序列表,同时后台启动 Service,播放视频文件。
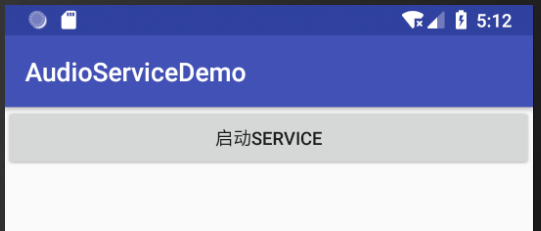
图 2 AudioServiceDemo的运行效果
该实例界面简单,仅一个按钮。布局文件 main.xml 的代码如下:
<?xml version="1.0" encoding="utf-8"?>
<LinearLayout xmlns:android="http://schemas.android.com/apk/res/android"
android:layout_width="fill_parent"
android:layout_height="fill_parent"
android:orientation="vertical">
<Button
android:id="@+id/button1"
android:layout_width="fill_parent"
android:layout_height="wrap_content"
android:text="启动Service" />
</LinearLayout>
实例 AudioServiceDemo 中 Activity 文件 AudioServiceDemoActivity.java 的代码如下:
package introduction.android.audioservicedemo;
import android.content.Intent;
import android.support.v7.app.AppCompatActivity;
import android.os.Bundle;
import android.view.View;
import android.widget.Button;
public class MainActivity extends AppCompatActivity {
private Button btn;
@Override
protected void onCreate(Bundle savedInstanceState) {
super.onCreate(savedInstanceState);
setContentView(R.layout.activity_main);
btn = (Button) findViewById(R.id.button1);
btn.setOnClickListener(new View.OnClickListener() {
@Override
public void onClick(View view) {
startService(new Intent("introduction.android.AudioServiceDemo.MY_AUDIO_SERVICE"));
finish();
}
});
}
}
AudioServiceDemoActivity 在按钮被单击后使用 startService() 方法启动了自定义的服务 MY_AUDIO_SERVICE,然后调用 finish() 方法关闭当前 Activity。该服务需要在 AndroidManifest. xml 文件中进行声明。
AndroidManifest.xml 的代码如下:
<?xml version="1.0" encoding="utf-8"?>
<manifest xmlns:android="http://schemas.android.com/apk/res/android"
package="introduction.android.AudioServiceDemo"
android:versionCode="1"
android:versionName="1.0">
<uses-sdk android:minSdkVersion="14" />
<application
android:icon="@drawable/ic_launcher"
android:label="@string/app_name">
<activity
android:name=".AudioServiceDemoActivity"
android:label="@string/app_name">
<intent-filter>
<action android:name="android.intent.action.MAIN" />
<category android:name="android.intent.category.LAUNCHER" />
</intent-filter>
</activity>
<service android:name="MyAudioService">
<intent-filter>
<action android:name="introduction.android.AudioServiceDemo.MY_AUDIO_SERVICE" />
<category android:name="android.intent.category.DEFAULT" />
</intent-filter>
</service>
</application>
</manifest>
其中:
<service android:name="MyAudioService">
<intent-filter>
<action android:name="introduction.android.AudioServiceDemo.MY_AUDIO_SERVICE" />
<category android:name="android.intent.category.DEFAULT" />
</intent-filter>
</service>
定义了名为 MyAudioService 的 Service,该 Service 对名为“introduction.android.AudioServiceDemo. MY_AUDIO_SERVICE”的动作进行处理。
实例 AudioServiceDemo 中 MyAudioService.java 的代码如下:
package introduction.android.audioservicedemo;
import android.app.Service;
import android.content.Intent;
import android.media.MediaPlayer;
import android.os.IBinder;
import java.io.IOException;
public class MyAudioService extends Service {
private MediaPlayer mediaplayer;
@Override
public IBinder onBind(Intent argO) {
// TODO Auto-generated method stub
return null;
}
@Override
public void onDestroy() {
// TODO Auto-generated method stub
super.onDestroy();
if (mediaplayer != null) {
mediaplayer.release();
mediaplayer = null;
}
}
@Override
public void onStartCommand(Intent intent, int flags, int startId) {
// TODO Auto-generated method stub
super.onStartCommand(intent, flags, startId);
String path = "sdcard/music/white.mp3";
mediaplayer = new MediaPlayer();
try {
mediaplayer.setDataSource(path);
mediaplayer.prepare();
mediaplayer.start();
} catch (IOException e) {
// TODO Auto-generated catch block
e.printStackTrace();
}
}
}
该服务启动 Mediaplayer,并播放存放于 SD 卡中的“sdcard/music/white.mp3”文件。


 B2C电商系统商城源码支持pC+小程序+公众号+H5可打包App源...
 原生开发淘宝客App,Android+ios独立开发,全开源支持二...
 知识付费系统在线教育平台源码+题库系统源码,PC+公众号商业授权...
 B2C单商户电商系统源码部署小程序+公众号+H5+App源码...
 教育知识付费系统源码带题库功能商业授权公众号+H5源码...
