在学接收短信和发送短信之前,先简单介绍一下 SMS 短消息服务。
SMS(Short Message Service,短信息服务)是一种存储和转发服务。也就是说,短信息并不是直接从发信人发送到接收人,而是始终通过 SMS 中心进行转发。如果接收人处于未连接状态(可能电话已关闭),那么信息将在接收人再次连接时发送。
要使 Android 应用程序能够接收短信息,需要以下三个步骤:
1)Android 应用程序必须具有接收 SMS 短信息的权限,在 AndroidManifest.xml 文件中配置如下:
<uses-permission android:name="android.permission.RECEIVE_SMS"/>
2)Android 应用程序需要定义一个 BroadcastReceiver 的子类,并通过重载其 public void onReceive(Context arg0, Intent arg1) 方法来处理接收到短信息的事件。
3)在 AndroidManifest.xml 文件中对 BroadcastReceiver 子类的 <intent-filter> 属性进行配置,使其能够获取短信息接收 Action。配置如下:
<intent-filter>
<action android:name="android.provider.Telephony.SMS_RECEIVED"
</intent-filter>
实例 receiveMessageDemo 演示了接收短信并提示的过程,运行效果如图 1 所示。
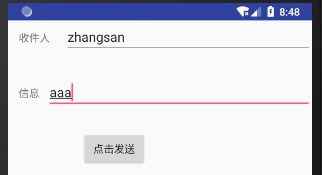
图 1 receiveMessageDemo实例
其 layout 文件 main.xml 的代码如下:
<?xml version="1.0" encoding="utf-8"?>
<LinearLayout xmlns:android="http://schemas.android.com/apk/res/android"
android:layout_width="fill_parent"
android:layout_height="fill_parent"
android:orientation="vertical">
<EditText
android:id="@+id/editText1"
android:layout_width="match_parent"
android:layout_height="wrap_content" />
<requestFocus />
</LinearLayout>
AndroidManifest.xml 文件的代码如下:
<?xml version="1.0" encoding="utf-8"?>
<manifest xmlns:android="http://schemas.android.com/apk/res/android"
package="introduction.android.receivemessagedemo"
android:versionCode="1"
android:versionName="1.0">
<uses-sdk android:minSdkVersion="14" />
<uses-permission android:name="android.permission.RECEIVE_SMS" />
<application
android:allowBackup="true"
android:icon="@mipmap/ic_launcher"
android:label="@string/app_name"
android:roundIcon="@mipmap/ic_launcher_round"
android:supportsRtl="true"
android:theme="@style/AppTheme">
<activity android:name=".MainActivity">
<intent-filter>
<action android:name="android.intent.action.MAIN" />
<category android:name="android.intent.category.LAUNCHER" />
</intent-filter>
</activity>
<receiver android:name="SmsReceiver">
<intent-filter>
<action android:name="android.provider.Telephony.SMS_RECEIVED" />
</intent-filter>
</receiver>
</application>
</manifest>
MainActivity.java 的代码如下:
package introduction.android.receivemessagedemo;
import android.support.v7.app.AppCompatActivity;
import android.os.Bundle;
import android.widget.EditText;
public class MainActivity extends AppCompatActivity {
@Override
protected void onCreate(Bundle savedInstanceState) {
super.onCreate(savedInstanceState);
setContentView(R.layout.activity_main);
EditText text = (EditText) this.findViewById(R.id.editText1);
text.setText("waiting.....");
}
}
Intent 广播接收器定义为 SmsReceiver,用于对接收到短信息的事件进行处理。
SmsReceiver. Java 的代码如下:
package introduction.android.receivemessagedemo;
import android.content.BroadcastReceiver;
import android.content.Context;
import android.content.Intent;
import android.os.Bundle;
import android.telephony.SmsMessage;
import android.widget.Toast;
/**
* Created ymama.net on 2019/4/10.
*/
public class SmsReceiver extends BroadcastReceiver {
StringBuilder strb = new StringBuilder();
@Override
public void onReceive(Context arg0, Intent arg1) {
Bundle bundle = arg1.getExtras();
Object[] pdus = (Object[]) bundle.get("pdus");
SmsMessage[] msgs = new SmsMessage[pdus.length];
for (int i = 0; i < pdus.length; i++) {
msgs[i] = SmsMessage.createFromPdu((byte[]) pdus[i]);
}
for (SmsMessage msg : msgs) {
strb.append("发信人: ");
strb.append(msg.getDisplayOriginatingAddress());
strb.append(" 信息内容 ");
strb.append(msg.getDisplayMessageBody());
}
Toast.makeText(arg0, strb.toString(), Toast.LENGTH_LONG).show();
}
}
当接收到短信息后,onReceive 方法被调用。由于 Android 设备接收到的 SMS 短信息是 PDU(Protocol Description Unit) 形式的,因此通过 Bundle 类对象获取到 PDUS,并创建 SmsMessage 对象。然后从 SmsMessage 对象中提取出短信息的相关信息,并存储到 StringBuilder 类的对象中,最后使用 Toast 显示出来。
测试该实例时,可通过 AVD Mananger,再启动一个 AVD,通过 AVD 的短信程序向当前 AVD 号码发送短信,就可使该实例被触发运行。
要实现发送短信功能,需要在 AndroidManifest.xml 文件中注册发送短信的权限,然后才可以使用发送短信功能。代码如下:
<uses-permission android:name="android.permission.SEND_SMS"/>
发送短信使用的是 android.telephony.SmsManager 类的 sendTextMessage 方法,该方法定义如下:
public void sendTextMessage(String destinationAddress, String scAddress, String text, PendingIntent sentIntent, PendingIntent deliveryIntent)
其中,各个参数的意义如下。
destinationAddress:表示接收短信的手机号码。
scAddress:短信服务中心号码,设置为 null 表示使用手机默认的短信服务中心。
text:要发送的短信内容。
sentIntent:当消息被成功发送给接收者时,广播该 PendingIntent。
deliveryIntent:当消息被成功发送时,广播该 PendingIntent。
实例sendMessageDemo 演示了发送短信的过程,其运行效果如图 1 所示。
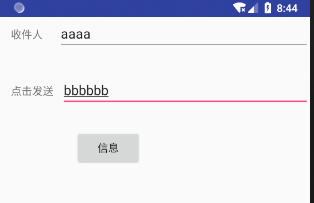
图 1 sendMessageDemo实例
在实例 sendMessageDemo 中,main.xml 的代码如下:
<?xml version="1.0" encoding="utf-8"?>
<LinearLayout xmlns:android="http://schemas.android.com/apk/res/android"
android:layout_width="fill_parent"
android:layout_height="fill_parent"
android:orientation="vertical">
<LinearLayout
android:layout_width="fill_parent"
android:layout_height="wrap_content"
android:orientation="horizontal">
<TextView
android:id="@+id/textview01"
android:layout_width="wrap_content"
android:layout_height="wrap_content"
android:layout_marginLeft="15dp"
android:text="收件人" />
<EditText
android:id="@+id/edittext01"
android:layout_width="fill_parent"
android:layout_height="wrap_content"
android:layout_marginLeft="20dp" />
</LinearLayout>
<LinearLayout
android:layout_width="fill_parent"
android:layout_height="wrap_content"
android:layout_marginTop="30dp"
android:orientation="horizontal">
<TextView
android:id="@+id/textview02"
android:layout_width="wrap_content"
android:layout_height="wrap_content"
android:layout_marginLeft="15dp"
android:text="@string/receiver" />
<EditText
android:id="@+id/edittext02"
android:layout_width="fill_parent"
android:layout_height="wrap_content"
android:layout_marginLeft="10dp" />
</LinearLayout>
<Button
android:id="@+id/button"
android:layout_width="wrap_content"
android:layout_height="wrap_content"
android:layout_marginLeft="100dp"
android:layout_marginTop="30dp"
android:text="@string/msg" />
</LinearLayout>
在实例 sendMessageDemo 中,AndroidManifest.xml 的代码如下:
<?xml version="1.0" encoding="utf-8"?>
<manifest xmlns:android="http://schemas.android.com/apk/res/android"
package="introduction.android.receivemessagedemo"
android:versionCode="1"
android:versionName="1.0">
<uses-sdk android:minSdkVersion="14" />
<uses-permission android:name="android.permission.SEND_SMS" />
<application
android:allowBackup="true"
android:icon="@mipmap/ic_launcher"
android:label="@string/app_name"
android:roundIcon="@mipmap/ic_launcher_round"
android:supportsRtl="true"
android:theme="@style/AppTheme">
<activity android:name=".MainActivity">
<intent-filter>
<action android:name="android.intent.action.MAIN" />
<category android:name="android.intent.category.LAUNCHER" />
</intent-filter>
</activity>
<receiver android:name="SmsReceiver">
<intent-filter>
<action android:name="android.provider.Telephony.SMS_RECEIVED" />
</intent-filter>
</receiver>
</application>
</manifest>
在实例 sendMessageDemo 中,MainActivity.java 实现了发送短信的功能,其代码如下:
package introduction.android.receivemessagedemo;
import android.app.Activity;
import android.os.Bundle;
import android.telephony.SmsManager;
import android.view.View;
import android.view.View.OnClickListener;
import android.widget.Button;
import android.widget.EditText;
import android.widget.Toast;
public class MainActivity extends Activity {
/**
* Called when the activity is first created.
*/
private Button button;
private EditText edittext01, edittext02;
@Override
public void onCreate(Bundle savedInstanceState) {
super.onCreate(savedInstanceState);
setContentView(R.layout.activity_main);
button = (Button) findViewById(R.id.button);
button.setOnClickListener(new buttonListener());
}
class buttonListener implements OnClickListener {
@Override
public void onClick(View v) {
// TODO Auto-generated method stub
edittext01 = (EditText) findViewById(R.id.edittext01);
edittext02 = (EditText) findViewById(R.id.edittext02);
String number = edittext01.getText().toString();
//获取手机号码
String messageOl = edittext02.getText().toString();
//获取短信内容
if (number.equals("") || messageOl.equals(""))
//判断输入是否有空格
{
Toast.makeText(MainActivity.this, "输入有误,请检查输入",
Toast.LENGTH_LONG).show();
} else {
SmsManager massage = SmsManager.getDefault();
massage.sendTextMessage(number, null, messageOl, null, null);
//调用senfTextMassage方法来发送短信
Toast.makeText(MainActivity.this, "短信发送成功",
Toast.LENGTH_LONG).show();
}
}
}
}
在实际应用该短信发送程序时,要注意一些限制问题,比如接收手机号码的格式、短信内容超过预定字符的提示等。
一般情况下,手机号码格式可以使用 Pattern 来设置,此外 Android SDK 提供了 PhoneNumberUtils 类来对电话号码格式进行处理,而短信内容超过 70 个字符会被自动分解为多条短信发送,在此不做具体描述。


 B2C电商系统商城源码支持pC+小程序+公众号+H5可打包App源...
 原生开发淘宝客App,Android+ios独立开发,全开源支持二...
 知识付费系统在线教育平台源码+题库系统源码,PC+公众号商业授权...
 B2C单商户电商系统源码部署小程序+公众号+H5+App源码...
 教育知识付费系统源码带题库功能商业授权公众号+H5源码...
